


 Posts
Posts


Showing posts with label Vegetables. Show all posts
Showing posts with label Vegetables. Show all posts
Wednesday, November 24, 2010
Sweet Potato and Cranberry Casserole
Happy Thanksgiving Week!! I thought it only appropriate to share my personal favorite Thanksgiving dish. This one has been passed down through my Mom's family over the years. I'm not sure where it came from originally. Its hard to chose a favorite on Thanksgiving, I truly do love them all, but if I had to pick just one item to accompany my turkey (always deep fried at our house), this would be it... Ingredients: 2 large cans plus 1 small can of yams- drained 2 cups of fresh cranberries 1/3 cup butter 1/2 cup flour 1/2 cup brown sugar 1/2 cup oats 1 teaspoon cinnamon mini marshmallows (optional) Pre-heat oven to 350 degrees. Struesel topping: In a bowl, mix flour, sugar, oats and cinnamon. Use a fork to cu the butter into the dry ingredients until the mixture resembles coarse crumbs. In a 1 1/2 quart buttered casserole dish, add sweet potato, cranberries (whole) and 1 cup of the struesel mixture and gently fold together. Sprinkle the remaining struesel over the top and bake for 40 minutes or so until warmed through. If you have a sweet tooth like me add a generous handful of mini marshmallows over the top for the last 10 minutes or so. They get toasty melty brown and add another layer of crunch as the dish cools. This dish is super simple to throw together and you can assemble it a day or two ahead if you like. The tart cranberries offset the sugary sweet yams and the warm cinnamon struesel makes it feel more like dessert than a dish. Enjoy!! Picture coming soon!

Tuesday, November 23, 2010
Truffled Oven Fries with Parmesan
For John's birthday dinner this week, I made his his favorite french bistro meal. Seared filets topped with Roquefort cheese, truffled oven fries, and sauteed spinach. Of course the fries (or pommes frites) are typically deep fried (if you're in the right place, they are fried in duck fat...yummmmy) but I decided to try a baked variation. I am pleased to say that the Birthday Boy declared it a success! 


Ingredients: (serves 2)
1 large russet potato
2 tablespoons of olive oil
1/2 teaspoon of dried, crushed rosemary generous pinch kosher salt and black pepper
2 tablespoons of finely grated parmesan cheese
1 teaspoon of black truffle oil
1 tablespoon of chopped fresh parsley
First I peeled the potato and cut it into sticks roughly a quarter of an inch thick. (I sliced the whole potato lengthwise into 1/4 inch slices, then I sliced each of those into 1/4 inch sticks and then cut those in half.) I soaked the potatoes in a bowl of cool water until I was ready to bake them.
I then drained the potatoes well and then spread them out on some papertowels to remove more of the moisture- blotting the top with another papertowel. I wanted to be sure they would get crispy so I attempted to get them as dry as possible.
I then tossed the potatoes with the olive oil, rosemary, salt and pepper in a bowl before spreading them into a single layer on a large rimmed baking sheet. (You want to spread them out the best you can so they brown on all sides, If you double the recipe, you'll definitely want to bake them on two baking sheets to give them ample room.) I baked them at 425 degrees for about 15 minutes and then, using a metal spatula, I flipped them oven and put them back in the oven for another 10-15 minutes. Watch for them to reach your desired level of brown and crunchiness.
As soon as they came out of the oven, I tossed them in a bowl with the cheese, truffle oil and parsley. Serve right away while they are nice and hot.

*If you're not familiar with truffle oil, it is absolutely heavenly. I picked up a small can of it at the grocery store for $12 and a little goes a long way. Its a worthwhile splurge and a great way to kick up a recipe for a special occasion!!!

Friday, September 10, 2010
Summer Tomato Bruschetta
I realize I've gone bonkers with summer tomato recipes lately, but its for good reason. Kentucky tomatoes are A.M.A.Z.I.N.G. and this is my first summer as a resident here... so I'm like a kid in a candy store... This bruschetta recipe is the perfect appetizer (casual yet elegant) or even a quick and easy lunch. The tomato mixture can be prepared in advance and stored in the fridge for up to 24 hours. Use any kind of tomato you like (grape, cherry, red, yellow, heirloom, etc.) the fresher, the better.  Summer Tomato Bruschetta: 2 red roma tomatoes, diced 2 yellow roma tomatoes, diced 1 clove of garlic- grated with a rasp 1-2 tablespoons of good quality olive oil 5 large basil leaves, thinly sliced 1/2 teaspoon of kosher salt a few grinds of pepper Balsamic Glaze for drizzling* *You can find balsamic glaze at Whole Foods, Fresh Market, and Harris Teeter for sure. It is GREAT stuff. Its excellent drizzled over hummus, grilled chicken or fish, or over any type of tomato salad. If you don't have it, add 1 tablespoon of balsamic vinegar and a small squeeze of honey to your tomato mixture instead. Gently fold all of the ingredients together in a bowl. Again you can set it aside or refrigerate until ready to serve. (You might wait and add the basil at the very last minute.) In this case I used ciabatta bread sliced in half horizontally. I used roughly 2/3 of the loaf as an appetizer for 4 people... we definitely ate it all. You could also use baguette rounds or slices of your favorite artisan bread. I will say using a thicker bread like a ciabatta made for messy eating. The tomatoes had a tendency to fall off the bread as you took a bite. A thinner slice might be ideal. I put the bread, cut side up, on a baking sheet and broiled it in the oven for 2 minutes (watching carefully not to burn) until just golden brown. Broiling gives you a toasty outside and a soft inside- however if you prefer to dry the bread out a bit for a crunchier toast, bake at 375 or 400 degrees for 15-20 minutes. (I've used the store bought bruschetta toasts before and they are pretty tasty as well.) If you're not shy about garlic, you could rub the toasted bread down with another clove of fresh garlic to give it extra zing. Otherwise, slice the bread into squares and spoon the tomatoes over the top. After the bruschetta is plated (at the very last minute), drizzle with the balsamic glaze. Buon Appetito!

Summer Tomato Bruschetta: 2 red roma tomatoes, diced 2 yellow roma tomatoes, diced 1 clove of garlic- grated with a rasp 1-2 tablespoons of good quality olive oil 5 large basil leaves, thinly sliced 1/2 teaspoon of kosher salt a few grinds of pepper Balsamic Glaze for drizzling* *You can find balsamic glaze at Whole Foods, Fresh Market, and Harris Teeter for sure. It is GREAT stuff. Its excellent drizzled over hummus, grilled chicken or fish, or over any type of tomato salad. If you don't have it, add 1 tablespoon of balsamic vinegar and a small squeeze of honey to your tomato mixture instead. Gently fold all of the ingredients together in a bowl. Again you can set it aside or refrigerate until ready to serve. (You might wait and add the basil at the very last minute.) In this case I used ciabatta bread sliced in half horizontally. I used roughly 2/3 of the loaf as an appetizer for 4 people... we definitely ate it all. You could also use baguette rounds or slices of your favorite artisan bread. I will say using a thicker bread like a ciabatta made for messy eating. The tomatoes had a tendency to fall off the bread as you took a bite. A thinner slice might be ideal. I put the bread, cut side up, on a baking sheet and broiled it in the oven for 2 minutes (watching carefully not to burn) until just golden brown. Broiling gives you a toasty outside and a soft inside- however if you prefer to dry the bread out a bit for a crunchier toast, bake at 375 or 400 degrees for 15-20 minutes. (I've used the store bought bruschetta toasts before and they are pretty tasty as well.) If you're not shy about garlic, you could rub the toasted bread down with another clove of fresh garlic to give it extra zing. Otherwise, slice the bread into squares and spoon the tomatoes over the top. After the bruschetta is plated (at the very last minute), drizzle with the balsamic glaze. Buon Appetito! 

Thursday, July 22, 2010
Carrot and Turnip Slaw with Dill
So as I've probably shared, I've recently set up shop in a home office here in Lexington, KY. While I love the flexibility and the fact that I can get up, put my hair in a pony tail and head into my office in jeans and a tshirt, it also presents a few challenges.  I scrubbed two medium and three small turnips and then peeled them with a pairing knife. (I'll admit that I ate one of the small ones at this point- delicious with some kosher salt sprinkled on top- so using three medium turnips would work just fine.) I also peeled five small/medium fresh organic carrots. NOTE: the recipe calls for 1 lb medium carrots and 8 oz white turnips. You could also use all carrots if you insist. I then used my food processor (the grater blade specifically) to grate them all together into a slaw.
  Side Note: Another one of the great yet also challenging apsects of working from home is my new little desk buddy, aka Cleo. I'm either ducking from side to side to see the computer monitor around her fuzzy white head (she likes to chase the mouse around the screen) or I'm forced to type everything one-handed as she has one of my arms pinned to the desk as her pillow. Exhibit A:
One big one is my kitchen. You underestimate the frequency at which you would visit your fridge/pantry if it was only a few feet away. Not only do I religiously eat a full breakfast and lunch now, I've also gotten into snacking which is dangerous. I definitely didn't have such compulsions when I was in the office every day (though I was subject to the temptation of donuts birthday cakes, and candy jars that generous colleagues brought in to share.)
Recently I determined the upside is that I can have healthy and inexpensive meals and snacks more readily available at home. (no vending machine, no expensive lunches out with friends -though I do miss those dearly- no potato chips/french fries teasing me in the cafeteria each day...)
I recently made this delicious carrot and turnip slaw from a new cookbook that a friend gave me called Simple, Fresh, Southern by Matt and Ted Lee of South Carolina. (The encore to James Beard Award Winning 'The Lee Brothers Southern Cookbook'.) It it F.A.N.T.A.S.T.I.C. I tell you. The recipes are unique and original spins on classic Southern flavors, ingredients and preparations. Some examples include Pimento-Cheese Potato Gratin, Devilled Egg Shrimp Salad Sandwiches, Collard Greens with Poblano Chiles and Chorizo, Mint Julep Panna Cotta, etc. I want to try everything so you'll surely see lots of posts coming soon. 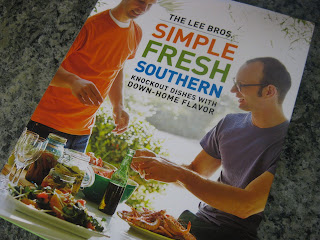 My mom brought me some fresh turnips from the farmer's market (they've been a favorite snack since I was in elementary school believe it or not) so when I found this recipe, it sounded like a perfect, light and fresh summer snack. (The goal was to distract me from the Oreo's in the freezer and it worked! kinda...)
My mom brought me some fresh turnips from the farmer's market (they've been a favorite snack since I was in elementary school believe it or not) so when I found this recipe, it sounded like a perfect, light and fresh summer snack. (The goal was to distract me from the Oreo's in the freezer and it worked! kinda...)If you're not familiar with turnips, you probably think you're not a fan- but I urge you to give them a fair shake. They have a texture similar to a carrot or radish and a sweet yet spicy flavor much like a cabbage. They are delicious roasted in the oven alongside carrots, parsnips and potatoes and I've also had them mashed- similar to rutabaga. (They will look much cleaner, almost entirely white with some purple at the ends in the grocery store.)
 I made a simple dressing for the slaw that was shockingly loud in flavor. My only complaint was that there wasn't enough of it. For this volume of veg, I'd recommend 1.5 times the following recipe:
2 Tablespoons finely chopped fresh dill
1/4 cup red or white wine vinegar
2 tablespoons extra-virgin olive oil
1/4 teaspoon ground cumin (I'd go a tad heavier next time)
2 small cloves garlic, finely grated (I recommend using a rasp and using 1 sm/med clove)
1/2 teaspoon crushed dried red chile flakes
1 teaspoon kosher salt (more to taste)
1/2 teaspoon freshly ground black pepper (more to taste)
Now that I re-read the recipe, the Lee Bros suggest you toss the dill in with the grated veggies first versus adding it directly to the dressing. This is a great idea - I actually had a hard time getting the dill evenly distributed in the slaw after dressing it. I think it would toss it better before any liquid is added.
You gently fold it all together and voila! The zest of the garlic, warmth of the cumin and kick from the chile flakes really makes this more exciting than your average coleslaw. I would eat a bowl of it for lunch with some cheese and crackers on the side. It would also be great for any summer bbq or picnic.
Side Note: Another one of the great yet also challenging apsects of working from home is my new little desk buddy, aka Cleo. I'm either ducking from side to side to see the computer monitor around her fuzzy white head (she likes to chase the mouse around the screen) or I'm forced to type everything one-handed as she has one of my arms pinned to the desk as her pillow. Exhibit A: 
Wednesday, July 14, 2010
Texas Strip Steak with Cilantro- Parsley Sauce and Crushed Potatoes
I was fortunate to spend last weekend visiting some of my best college friends in Fort Worth, Texas. Though I could very easily have eaten Tex-Mex three meals a day and enjoyed every last bite of it, we opted to cook dinner in Saturday night. We were feeling spent after a decadent brunch at Tillman's Roadhouse followed by an afternoon sipping frozen lemonade with vodka by the pool. Before I get to the menu, I have to tell you about three AMAZING Fort Worth destinations that I would demand you visit if you're ever in the area. 1. La Familia Tex Mex. I hadn't been on Texas soil an hour before I was greeted warmly by an unbelievably delicious and ENORMOUS margarita, a cup of queso and a huge basket of fresh tortilla chips at La Familia. Let's just say my hostess knows me very well... They bring you a little cup of delicious soup before your meal. For dinner we opted for Tacos al Carbon- one chicken, one steak- loaded with grilled onions inside of freshly made tortillas and accompanied by fresh guac, pico, cheese, etc. HEAVENLY I tell you... Oh, did I say margarita?? I meant to tell you that it HAD A BEER STICKING OUT OF THE TOP and flaming sugar cubes on the sides as they brought it to the table... As you drink the margarita (you'll need a straw for this one) the beer slowly empties into the glass. Absolutely amazing!  Can't wait to get back some day soon.. where everything is bigger, and as far as eating and drinking goes, maybe a little better... in Texas!!

2. I mentioned Tillman's Roadhouse brunch earlier... this place was absolutely unlike anything I've ever seen before. It is rustic roadhouse meats metropolitan chic. Its a log-cabin feel with longhorns on the wall and huge crystal chandeliers hanging from the ceiling. You'd really have to see it to understand but the food was equally as clever and unique. They bring you fresh fried kettle chips at the table when you sit down and the menu incredible. We'd already been warned about dessert so unfortunately we decided to pass on the house made monkey bread that I happened to see at a nearby table. It was a HEAP of gooey doughy cinnamon deliciousness.
For my entree I enjoyed the "Bennie and the Jets" dish of two blue corn cakes topped with pulled pork bbq, poached eggs and green chile "bacon-daise." Lets just say its a benedict like you've never experienced before. Incredible. 'Nuff said.
Lastly... we ordered the Smores for dessert... The brought us three different kinds of HOMEMADE marshmallows (espresso, maple and orange flavors), rich dark chocolate squares and house made graham crackers on a huge platter. Then they bring out mini bonfires (in little clay pots) and skewers for you to toast your marshmallows table side! I'm telling you, if you're ever in the area, you can't miss it.
3. Central Market. If you've been to Austin or DFW you've probably heard of Central Market but this was my first experience. It is any food lovers HEAVEN ON EARTH. It is an enormous market that I would equate to Whole Foods on super steroids. It is a giant warehouse containing the most impressive array of fresh produce, meets, seafood, wine and grocery items. This is where we did our shopping for dinner Saturday night and I literally could have spent days there. When it was time to plan a menu for dinner, I had no hope of topping brunch but seeing as we were in cattle country I picked out three TEXAS-sized strip steaks which was more than enough for the six of us. I seasoned them simply with a steak rub and let sit out at room temperature while I prepped a quick and simple Parsley-Cilantro dipping sauce and Michael Chiarello's Potatoes da Delphina.
I'll refer you to Michael's recipe for more details about the potatoes but its a fun alternative to baked or your standard roasted potatoes. I subbed in parmesan cheese for the lemon zest this time.
For the Cilantro-Parsley Sauce, I combined the following ingredients in the food processor:
1/2 bunch parsley, stems removed 1/2 bunch cilantro, stems removed 1 jalapeno, seeds removed, roughly chopped 2 large cloves of garlic 1/4 cup red wine vinegar 1 teaspoon salt 1/2 teaspoon pepper I whirred everything together in the food processor and then while it was running I slowly poured about 1/3 cup of olive oil down the spout. I grilled the steaks for approx 4 minutes per side for medium rare. Liz had sliced a large vidalia onion into thick slices and then wrapped them up in tin foil with some butter, Worcestershire sauce, salt and pepper. (I think..) I set the foil packets on the grill at the same time as the steaks. I then threw on some asparagus (with just olive oil, salt and pepper) for the last 4 minutes of the grill time. I let the steaks rest 10 minutes and then sliced them on a large wooden cutting board and let everyone serve themselves. (I was keeping the potatoes warm in the oven until ready to serve.) I transferred the Cilantro-Parsley sauce to a small pitcher to drizzle over top the steak. It adds a huge punch of flavor. You'll end up dunking just about everything on your plate into it. Can't wait to get back some day soon.. where everything is bigger, and as far as eating and drinking goes, maybe a little better... in Texas!!
Picnic Perfect Black Bean and Corn Salad
John and I were invited to a 4th of July picnic with some new friends in Lexington and each guest was to bring a side dish. This pot-luck-ish scenario always throws me for a loop because I'm constantly worried about making something too generic -others might bring the same- or too far out there -might not accommodate every one's taste. (Nobody wants to claim the dish at the end of the night that has hardly been touched...) After much debate I settled on a Black Bean and Corn Salad. My Mom makes a dip or salsa that is very similar so I fused her recipe (a fusion of two other recipes) with a Grilled Corn, Jicama and Black Bean Salad recipe that I found on Epicurious.com. I loved the idea of grilling the corn for more flavor and adding jicama for crunch- however based on a review of the recipe on Epicurious, I decided to roast the corn in the oven. I cut the corn kernels off of the cob *click here for instruction and placed them in a pile in the center of a large baking sheet sprayed lightly with Pam. I then drizzled the pile with a bit of olive oil, sprinkled with a small pinch of salt and pepper and then tossed to coat before spreading it evenly over the pan. I roasted the corn for 8-10 minutes at 425 degrees until just golden brown. If you're not familiar with jicama, it is a root vegetable described by wikapedia as a "Mexican turnip." It is very crisp and light with a very mild flavor and a texture similar to a raw apple. Frankly, it takes on the flavor of whatever the preparation but adds great crunch to a salad or slaw such as this one.
 Ingredients: 3 large ears of corn, roasted per above 2- 15 oz cans of Black Beans (drained and rinsed well) 1- red or orange bell pepper- cut to a small dice (similar to the size of a bean or corn kernel) 1 jalapeno pepper- seeds removed and diced VERY finely 1 cup jicama- peeled and diced 4 or 5 green onions- white and green parts, thinly sliced 1/3 cup cilantro- chopped
I combined all of the veggies in a large bowl and then mixed up the dressing on the side: 2 tablespoons fresh lime juice 2 tablespoons fresh orange juice 2 tablespoons balsamic vinegar 3 tablespoons olive oil 1/2 teaspoon cumin 1 teaspoon kosher salt 1/4 teaspoon cayenne pepper
I mixed the dressing thoroughly with a fork, poured over the salad mixture, and gently folded everything together. The salad actually gets better as it sits in the fridge- I recommend at least 2 hrs- and it keeps for up to 3 or 4 days in the fridge.It was the perfect cool crunchy compliment to fried chicken on a hot July 4th day. It would be great with a tex-mex menu or you could serve it for lunch with the addition of some grilled chicken or shrimp.

We enjoyed left overs the following day alongside some fantastic burgers. (Extending our 4th celebration to the 5th.) We used 2/3lb lean ground beef and 1/3lb ground sirloin (makes four hefty burgers), seasoned simply with a Napa Style Steak/Burger spice rub. John grilled the burgers, grilled some asparagus and lightly toasted fresh rolls from our grocer's bakery while I caramelized some vidalia onions and sliced some Gruyere cheese for toppings. Happy Birthday America... 
Friday, July 2, 2010
Oven Roasted Halibut with Carrots and Beets
Halibut is one of my very favorite fishes. I've been working to find the very best cooking preparation. I would venture to say its not quite as forgiving as something like Salmon. If you over cook it or cook it unevenly the texture changes dramatically to tough and almost fibrous. Fortunately, this last dish came out very very well. (If I do say so myself...) I found beautiful Halibut fillets (1 and 1/2 inches thick) at Whole Foods- I purchased approx 1/2 or 2/3 of a pound for the two of us. Seeing as I was spending $17/lb on the fish for a weeknight dinner, I made a simply medley of roasted root vegetables on the side. It is very inexpensive but still delicious. I chose baby carrots, red beets and vidalia onion. I LOVE beets and red ones give the roasted vegetables a beautiful ruby red color. Preheat oven to 425 degrees. Roasted Carrots and Beets: 1 generous cup of carrots (if baby carrots, cut in half- if larger, cut into 1/2 inch pieces) 3 medium/large red beets (peeled and diced into 1/2 inch pieces) 1 small vidalia onion (diced into 1/2 inch pieces) While its a little putsy to cut the veggies into smaller pieces, you make up the time while cooking. Cutting them roughly the same size also ensures everything cooks evenly which is important. I would also recommend wearing plastic gloves to peel and dice the beets as the red does stain your hands a bit. If you don't have them, I sometimes use a paper towel to hold the beets. I actually set the beets aside in a separate bowl from the carrots and onions to avoid everything turning immediately red. I made a quick dressing for the veggies: 1/4 cup olive oil 2 tablespoons of balsamic vinegar the juice of half an orange 1 tablespoon of honey 1/2 teaspoon of dried thyme 1 teaspoon kosher salt 1/2 teaspoon pepper I mixed it together in a liquid measuring cup and then poured 2/3 of the mixture over the carrots and onions in one bowl, tossing everything to coat with the dressing. I then tossed the beets with most of the remaining dressing (save just a tiny bit) before transferring everything to a large baking sheet sprayed lightly with Pam. Into the oven they go for 20 minutes. In the meantime I rubbed the halibut fillets with the last drops of the dressing and seasoned with kosher salt and pepper. I set them out at room temperature while the vegetables were roasting so that they would cook evenly through. At the 20 minute mark, I first shuffled the vegetables about the baking sheet with a spatula and then pushed them toward the sides to make a small space in the middle of the pan for the halibut. I placed the filets on the baking sheet (you get a nice sizzle seeing as the pan is already hot from the oven) and roasted everything together for another 10-12 minutes until the fish was perfectly tender. The fish should be barely firm to the touch and will flake easily when pierced with a fork. You can test a corner to be sure its just right.  Yummm..... The dish was surprisingly light yet roasting the vegetables lends a heartiness to the meal.

Yummm..... The dish was surprisingly light yet roasting the vegetables lends a heartiness to the meal. I actually forgot to serve it with dinner but I enjoyed the left over roasted vegetables for lunch the following day with crumbled goat cheese over the top. Its an absolutely fantastic combo.
Wednesday, June 16, 2010
Oven Roasted Ratatouille
In the spirit of summer vegetables and as a thank you to my mom for her help as my gardening instructor, I made two dishes of Oven Roasted Ratatouille- one for John and I and one for my Mom to take home for she and my dad to enjoy. I used a recipe that I found on smittenkitchen.com for a Ratatouille inspired baked veggie concoction. I've been looking for an excuse to use the mandolin that John got me for Christmas too so this was just perfect. I found that the zucchini squash (I used green and yellow) was easy to slice quickly with the mandolin but the eggplant and bell pepper aren't necessarily mandolin-able due to the toughness of the skin. I sliced those thinly with a sharp knife- to about 1/8 of an inch. For two medium-sized baking dishes of the Ratatouille I used: 2 red bell peppers 4 medium sized squashes 2 small eggplants I set my vegetables aside in three different dishes. After coating two dishes with non stick spray, I made a "sauce" mixture in the bottom by adding the following ingredients to each of the dishes: 1 cup tomato puree (from a can) 2 cloves of garlic, thinly sliced 1/2 cup finely chopped sweet onion (you'll use about one medium onion total) 1 tsp dried Herbs de Provence 1/2 tsp kosher salt 1/4 tsp cracked black pepper (NOTE: you'll need twice these proportions for both pans or for one large 9 x 13 pan.) I gently stirred everything together right in the dish and then spread it evenly to coat the bottom. I layered the vegetables into the dishes, alternating to nicely display the colors. I then drizzled the top with olive oil and dusted everything with kosher salt, black pepper and some more dried Herbs de Provence. 

Per SmittenKitchen's suggestion, I cut a piece of parchment paper to sit atop the vegetables. They baked at 375 degrees for 50 minutes. (You don't want them to get brown or they will get mushy and mushy is what gives eggplant a bad name.) The smell as the ratatouille bakes is absolutely heavenly. When you spoon the vegetables out of the dish, you have a yummy sauce (cooked perfectly while baking) to spoon over the top. I could eat a plate full of the veggies alone for a meal but I served them alongside a piece of quickly seared yellowfin tuna, also dusted lightly with salt, pepper and Herbs de Provence and a big piece of toasted ciabatta bread rubbed with garlic and drizzled with olive oil. Summery and delicious!
The next night, I used my left over ratatouille as a bed for a fried egg and enjoyed it "hash" style alongside an arugula salad with fresh lemon juice, olive oil and shaved parmesan. Definitely a keeper recipe. Will have to try it again when I have some fresh squash of my own from the garden!
Farm Fresh from Our New Kentucky Home
No more apologizing, I've been doing it a lot lately... but I know its been ages since my last post. For those of you still tuning in at home, John and I moved to Lexington, KY just over one week ago and as you can imagine, things have been a bit hectic. As the dust begins to settle, I bring to you a brand new Accidental Syrup from our New Kentucky Home! 

 Lastly we planted marigolds around the edges to deter critters from snacking the veggies and then I weaved a soaker hose between the plants. This makes watering easy as you can just hook the hose up for 30 mins or so on days without much rain to ensure everything stays watered. All in all it was actually a fairly easy project though now, I've found the waiting to be the hard part. I walk out to check on the garden each day and find myself staring suspiciously in hopes that I might catch a vegetable sprouting before my eyes. No such luck yet though I do look forward to sharing recipes featuring the fruits of my labor as we get into the summer months!
While the very first thing that I unpacked was my kitchen, I haven't really gotten into my cooking routine yet. I did find inspiration for this delicious summer vegetable dish one evening after my mom and I planted my garden. (See my next post for the recipe)That's right! My very own garden. My mom has the greenest thumb around and she has a bounty of fresh vegetables picked fresh from her garden all summer. When we found out we were moving up this way, I was immediately excited about the opportunity to learn all of her secrets.
Fortunately our new yard already had a nice garden frame (for lack of a better word), though we had to remove the luscious weed garden that occupied it in order to fill it with gardening soil. The garden is probably 8 x 14 feet or so and we filled it with mom's magical gardening soil mix:
- Four large bags of Miracle Grow Gardening Soil
- 20 bags of generic Top Soil
- One large bag of Peat Moss
We "folded" it all together with shovels to ensure it was well mixed before gently leveling it out with the back of a rake. We then planted a variety of tomato plants -yellow cherry, red grape, Roma, Better Boy, and various heirlooms including two plants from my grandfather up in Pennsylvania. He's been cultivating heirloom tomato plants that trace back to his native land of Italy for as long as I've been alive, and longer I'm sure. We also planted cucumbers, peppers of all kinds and colors, squash, and okra. All of these plants require at least 6 hours of direct sunlight per day so they can co-exist nicely together in a garden. I followed the instructions on the plant labels in terms of how far apart each should be planted.
Lastly we planted marigolds around the edges to deter critters from snacking the veggies and then I weaved a soaker hose between the plants. This makes watering easy as you can just hook the hose up for 30 mins or so on days without much rain to ensure everything stays watered. All in all it was actually a fairly easy project though now, I've found the waiting to be the hard part. I walk out to check on the garden each day and find myself staring suspiciously in hopes that I might catch a vegetable sprouting before my eyes. No such luck yet though I do look forward to sharing recipes featuring the fruits of my labor as we get into the summer months! Sunday, March 7, 2010
Crunchy Baked Pork Chops with Roasted Broccoli
Browsing online for an easy dinner recipe requiring few ingredients other than those already in the pantry/fridge, I stumbled upon Smitten Kitchen's Crunchy Baked Pork Chops. She borrowed the recipe from Cooks Illustrated so I knew it had to be good. Cooks Illustrated is the Bible of cooking magazines in my opinion- its expensive though (there are no advertisements in it) so I actually don't have a subscription at the moment. I took a few short cuts based on what I had on hand. I adapted the recipe as follows: Preheat oven to 425 degrees. (for both the pork and broccoli) 3 boneless center cut pork chops, each about 1 inch thick 1/2 cup flour seasoned with salt and pepper 1/2 cup panko bread crumbs 2 cloves of garlic- pressed 1/4 cup grated parmesan cheese 2 eggs 1 tsp dijon mustard Beat the egg with the dijon mustard in a shallow dish. Mix the bread crumbs, pressed garlic, and parmesan cheese in another dish. Dredge each chop first in the seasoned flour, second in the egg wash and lastly coat them in the crumb mixture. You want to press the chops into the bread crumbs to ensure you have a thick coating on all sides. Place the chops on a baking sheet (lined with foil for easy clean-up), drizzle with olive oil to help the crumbs toast and set aside. 
 Roasted Broccoli is all the rage these days so I decided to give it a try. Tyler, Ina, and just about every cooking mag I read has raved about it over the past year or so and for good reason I tell you. I took notes from Ina Garten's recipe on this one: 3 bunches of broccoli (mine were fairly small) 3 cloves of garlic- minced Juice and zest of 1 large lemon 1/4 cup grated parmesan cheese Olive oil, salt and pepper I cleaned the broccoli and sliced it into spears, trying to keep them approximately the same size. I made sure to dry the broccoli as much as possible with a few paper towels which helps it to caramelize and brown versus just steam and get soggy in the oven. I arranged it on a baking sheet, drizzled with 1-2 tablespoons of olive oil, and seasoned with kosher salt and pepper. I then tossed it together with the minced garlic and until evenly coated. The broccoli and pork went into the oven the same time. I set the timer for 17 mins and then watched the pork closely from there until just cooked through to medium (150 degrees by a meat thermometer). I think I let mine go 19 mins total. There is nothing worse than a dry, overcooked pork chop so watch carefully! I removed the pork and continued to cook the broccoli another 5 or 6 minutes while the pork rested. Right as the broccoli came out of the oven, I sprinkled it with the parmesan cheese, the lemon juice and zest - tossing it all together.
  I served the pork and broccoli together with another squeeze of fresh lemon juice over the top of everything. The crunchy, garlicky crust of the pork worked perfectly with the toasty lemony-garlic flavors of the broccoli. Roasting it really gives it a depth of flavor you just can't get from steaming it. It tastes like a whole different vegetable. Besides, broccoli lover or not (it just so happens that I am) sprinkle parmesan and garlic on just about anything and its bound to be good. Smitten Kitchen used fresh bread crumbs and fresh parsley in the pork coating mixture and she toasts the mixture before coating the pork. I think the parsley would really be divine and honestly, toasting the crumb mixture would have taken a little of the bite off of the garlic which was fairly potent this go round. I will probably go that route next time even though it will add few minutes of prep time. Another yummy, quick, and inexpensive, weeknight meal that required very little by way of dirty pots/pans/dishes! I'd definitely reccomend...
Roasted Broccoli is all the rage these days so I decided to give it a try. Tyler, Ina, and just about every cooking mag I read has raved about it over the past year or so and for good reason I tell you. I took notes from Ina Garten's recipe on this one: 3 bunches of broccoli (mine were fairly small) 3 cloves of garlic- minced Juice and zest of 1 large lemon 1/4 cup grated parmesan cheese Olive oil, salt and pepper I cleaned the broccoli and sliced it into spears, trying to keep them approximately the same size. I made sure to dry the broccoli as much as possible with a few paper towels which helps it to caramelize and brown versus just steam and get soggy in the oven. I arranged it on a baking sheet, drizzled with 1-2 tablespoons of olive oil, and seasoned with kosher salt and pepper. I then tossed it together with the minced garlic and until evenly coated. The broccoli and pork went into the oven the same time. I set the timer for 17 mins and then watched the pork closely from there until just cooked through to medium (150 degrees by a meat thermometer). I think I let mine go 19 mins total. There is nothing worse than a dry, overcooked pork chop so watch carefully! I removed the pork and continued to cook the broccoli another 5 or 6 minutes while the pork rested. Right as the broccoli came out of the oven, I sprinkled it with the parmesan cheese, the lemon juice and zest - tossing it all together. I served the pork and broccoli together with another squeeze of fresh lemon juice over the top of everything. The crunchy, garlicky crust of the pork worked perfectly with the toasty lemony-garlic flavors of the broccoli. Roasting it really gives it a depth of flavor you just can't get from steaming it. It tastes like a whole different vegetable. Besides, broccoli lover or not (it just so happens that I am) sprinkle parmesan and garlic on just about anything and its bound to be good. Smitten Kitchen used fresh bread crumbs and fresh parsley in the pork coating mixture and she toasts the mixture before coating the pork. I think the parsley would really be divine and honestly, toasting the crumb mixture would have taken a little of the bite off of the garlic which was fairly potent this go round. I will probably go that route next time even though it will add few minutes of prep time. Another yummy, quick, and inexpensive, weeknight meal that required very little by way of dirty pots/pans/dishes! I'd definitely reccomend... 
Subscribe to:
Posts (Atom)


