It seems everywhere you go in Lexington this time of year, friends and neighbors are eager to share fresh summer vegetables with you. Unfortunately, my garden hasn't produced much of anything yet because I got such a late start- so I've been grateful to enjoy the surplus of others. My mom gave me a beautiful zucchini the other day- it must have been 10 or 11 inches long- absolutely perfect for this recipe. I sliced the zucchini length wise and gently carved out the seeds with a spoon, leaving a shell barely one half inch thick. I then pricked the flesh all over with a fork to help it cook all the way through while baking. You also use two or three smaller zucchini if you like- the grocery store rarely carries the giant variety. I preheat the oven to 375 degrees...

The secret to the sauce is
fresh local summer tomatoes. You could use any kind you like- grape, cherry, red, yellow, Roma, etc. I find that the large tomatoes such as Better Boys have tougher skins that should really be removed. Simple Summer Tomato Sauce: 2 tablespoons of olive oil 1/2 of a sweet onion, diced (you'll use the other half in the filling so you can dice the whole onion) 2 cloves of garlic, minced (you'll use two more in the filling so go ahead and mince 4) 1/2 teaspoon dried thyme 1 teaspoon tomato paste 1 cup of grape tomatoes, halved 1 large tomato, peeled and crushed by hand 1/4 cup water 1 teaspoon of sugar salt and pepper to taste 5 or 6 fresh basil leaves, sliced thinly I started the olive oil and onion in a saucepan over medium heat, sauteed for 3-4 minutes until the onions were translucent, and then I added the garlic, thyme and tomato paste. I cooked the mixture for one minute, stirring well, before adding the tomatoes, sugar and water. Lastly I seasoned the sauce with salt and pepper and let it simmer over medium-low heat for 10-12 minutes, stirring occasionally. (I actually didn't add the basil until just before serving to maximize the flavor.)

While the sauce was simmering away, I made the filling which consisted
of the following: 1/2 pound sweet Italian sausage (casings removed if using links) 1/2 of a small sweet onion, diced (approx 1/2 cup) 1/2 of a bell pepper, diced 1/2 cup Cremini (baby portabella) Mushrooms, roughly chopped 2 cloves of garlic, minced 1/2 teaspoon of dried thyme 1/2 teaspoon crushed red pepper flakes 2 cloves of garlic, minced salt and pepper to taste I started with a generous drizzle of olive oil in a skillet over medium heat and then added the onions. I sauteed the onions for two minutes before adding the bell pepper, and a minute or two later the sausage. I cooked it all together for 7 or 8 minutes, breaking the sausage up with a spoon as it browned. As soon as the sausage was approaching cooked through, I added the remaining ingredients and cooked for two more minutes.

I spooned the filling into the zucchini, packing it in to fit as much as possible. I then spooned some of the sauce over the top (maybe one third of it) and sprinkled over a mixture of grated Italian cheeses.
(Next time I would actually mix 1/3 of the sauce into the filling before stuffing the zucchini versus spooning it over the top. I think it would have helped to bind it all together a bit better.) I then poured 2/3 cup white wine into the dish, covered the dish with tin foil and put it into the oven for 30 minutes. After 30 minutes, I removed the foil, spooned some of the wine and juices from the dish over the top of the zucchini and cooked 10 minutes longer, letting the cheese get nice and toasty brown.
I served the zucchini over a bed of the sauce with a green salad on the side. It would also be good with a side of pasta. You could double the sauce recipe in that case. It really was tasty- (though missing a big crusty piece of garlic toast). The zucchini was perfectly tender and the filling was hearty and flavorful. The extra sauce on the plate added a big punch of freshness without making it soggy (a danger if the sauce is served over the top.)
You could also use the same preparation (filling and sauce) for stuffed baby eggplant or stuffed bell peppers. Its hard to go wrong with this combination... yum.


 Posts
Posts


 Ricotta-Mascarpone Cannoli Filling (fills approximately 8-10 large shells) 1- 8 oz container of mascarpone cheese 1 1/2 cups of ricotta cheese (if you have time to drain it in some cheese cloth, it makes for a thicker filling, but its certainly not necessary) 2/3 cup powdered sugar (more to taste, I don't like it overly sweet) 1 teaspoon vanilla extract (I like vanilla bean paste) 1/2 teaspoon almond extract 1/4 cup mini semi sweet chocolate chips Blend all of the ingredients -except the chocolate chips-together in a food processor. Through trial and error the first few attempts at making the filling, I learned that a food processor is the best way to ensure the filling is smooth creamy, eliminating the graininess of the ricotta cheese. Lastly, I mix the chocolate chips into the filling with a spoon and then transfer the mixture to a large, freezer quality ziplock bag (my version of a disposable pastry bag.) The ticket to perfectly crispy crunchy cannolis is to fill them within a couple of hours from serving. The longer they sit in the fridge, the soggier the shells become. When ready- I squish all of the filling down to one of the bottom corners of the bag and then I cut a small corner with a pair of scissors. I fill each shell, starting in the middle and filling out to the edges- turn it and fill the other side. For the chocolate lovers out there, you can dunk the ends into more mini chocolate chips- it looks fancy too. The traditional Sicilian cannolis would also have candied fruit pieces mixed into the filling and for decoration on the ends.
 Serve as is or with a light dusting of powdered sugar over the top- if I'm serving guests, I like put them on a decorative plate with a big pile of fresh strawberries. One of my ABSOLUTE favorite pastries, I could go for one right now actually...


 Simple Pomodoro Sauce: 3 tablespoons good quality olive oil 1/4 cup of diced onion 2 cloves of garlic, minced or grated 1/2 teaspoon dried thyme 1/2 teaspoon died oregano 1 tablespoon of balsamic vinegar Approx 3 cups of roughly chopped fresh tomatoes of any variety salt and pepper I start the olive oil in a saucepan over medium high heat. I then sauteed the onion for 2 minutes until barely translucent. I then add rest of the ingredients through the vinegar and cook together, stirring, for 2 more minutes. I then add the tomatoes, season with a pinch of salt and pepper and let cook together over medium heat for 20 minutes or so until the flavors marry together and the sauce reduced slightly.
 For my plate however I omitted the sausage and simply ladled the tomato sauce in the bottom of the dish under my gnocchi which I also dusted with cheese and basil. I think the presentation was fun and a little bit "Top Chef-esque" this way but you could also toss the gnocchi into the sauce before plating if you prefer. This is truly a great staple 30 minute dinner and worked out to be the perfect "his and hers" pasta recipe too.

 I enjoyed the soup, doused generously in freshly grated parmesan cheese, alongside a simple salad of arugula and fresh radishes dressed with a quick lemon vinaigrette: Juice from half a lemon 1 teaspoon of red wine vinegar 2 tablespoons of olive oil 1/2 teaspoon of dijon vinegar (add a pinch of sugar if you don't like it really tart.. I do.)
  Light and healthy - hearty and delicious. Lots of left overs for the week. I actually froze 1/3 of the pot in an airtight tupperware container to enjoy another lazy day soon. Fall is just around the corner!
 Chocolate Custard: •2/3 cup sugar •1/4 cup cornstarch •1/2 teaspoon salt •3 large egg yolks •2 cups milk (all I had on hand was skim and it was still delicious, whole milk would be richer) •1/2 cup good quality bittersweet chocolate, melted •1 tablespoon unsalted butter •1 teaspoon vanilla


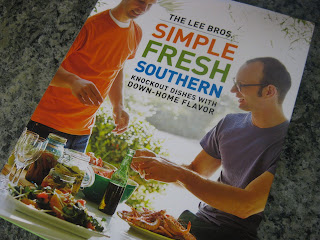 My mom brought me some fresh turnips from the farmer's market (they've been a favorite snack since I was in elementary school believe it or not) so when I found this recipe, it sounded like a perfect, light and fresh summer snack. (The goal was to distract me from the Oreo's in the freezer and it worked! kinda...)
 I made a simple dressing for the slaw that was shockingly loud in flavor. My only complaint was that there wasn't enough of it. For this volume of veg, I'd recommend 1.5 times the following recipe:
 Side Note: Another one of the great yet also challenging apsects of working from home is my new little desk buddy, aka Cleo. I'm either ducking from side to side to see the computer monitor around her fuzzy white head (she likes to chase the mouse around the screen) or I'm forced to type everything one-handed as she has one of my arms pinned to the desk as her pillow. Exhibit A:


