


 So imagine my surprise (and delight) when I spotted them at Fresh Market a few weeks ago!!There are a little pricey (I think $14/lb?) but WORTH.IT. Marinated simply in the following marinade (1 hour is sufficient), a quick grilling or pan searing of these babies is all you need for what I assure you is a super special meal... Lamb Marinade: 2 large cloves of garlic, minced 1/4 cup olive oil juice of 1 lemon 1 teaspoon of salt 1/2 teaspoon of black pepper 1 generous teaspoon of fresh rosemary, chopped *This was just enough for one pound of lamb. Similarly, I dressed my cleaned, halved fingerling potatoes with a mixture of: 3-4 tablespoons of olive oil 1 teaspoon of kosher salt 1/2 teaspoon of black pepper 2 cloves of garlic, minced 1 teaspoon of fresh rosemary *I had a bag of fingerlings from the store, roughly two pounds, maybe not quite... I tossed the potatoes in the mixture and then roasted them at 425 degrees for approximately 35 minutes total. I started them cut side down and then flipped them half way through.
  Just as I put the potatoes in for the second half of bake time (post flip), I cooked my lamb. I removed the lamb tenderloins from the marinade and seared them over high heat- in a drizzle of olive oil- for barely 2 minutes per side. They were perfectly caramelized on the outside and a lovely medium/medium rare inside. I let them rest, tented loosely with tin foil while I quickly sauteed one bag of baby spinach in the same pan. I thinly sliced two garlic cloves to add in with a drizzle of oil, salt and pepper. It cooks down almost immediately over medium heat. (I take it off the heat before the last of the leaves have wilted to ensure it doesn't get too soft.)
A classic "steak house" dinner made even more special by way of lamb. Just as with chicken, pork or beef, the lamb tenderloins are melt-in-your mouth tender and juicy. You MUST keep your eyes peeled for them... you'll thank me!

This meal serves 4 however I would use 2 bags of spinach.


 Soup and Salad would not typically be John's first choice for dinner, but this creamy, sweet and savory soup paired with my favorite hearty fall salad didn't get any complaints from the peanut gallery... For the salad- I use mixed greens, baby spinach, or whatever lettuce I have on hand. I start with a handful of greens on each plate. I then top it with some freshly diced apple (honeycrisp or pink lady are my favorites), a sprinkle of dried cranberries, a spoonful of crumbled blue/gorgonzola/goat cheese, and a sprinkle of nuts if I have some handy. (Candied pecans or lightly toasted almonds are both yummy.) I drizzle the salad with a quick of vinaigrette of balsamic vinegar, olive oil, dijon mustard and honey. (2 tablespoons each of oil and vinegar, 1 teaspoon each dijon and honey). Its the perfect combination of crunchy, sweet, and tangy. Somehow, I never get tired of it. (John claims he's not sick of it yet either but my bet is that he's getting close.)
 I will admit to you that twice before I attempted to make mac and cheese, both times failing miserably. I think I subconsciously told myself "surely skim milk or whole wheat pasta will do" or "we don't need quite that much cheese"... wrong. If you're going to do it- you must do it right. Martha's Macaroni and Cheese: (adapted from
  1. Preheat oven to 375°F. Butter a 3-quart casserole dish; set aside. Place the panko bread crumbs in a medium bowl. In a small bowl, melt 2 tablespoons butter in the microwave. Pour the melted butter into the panko, and toss. Set aside.
 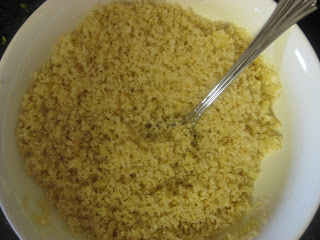 2. Warm the milk in a medium saucepan over medium heat. Melt the remaining 6 tablespoons butter in a high-sided skillet over medium heat. (I actually boiled my pasta first and then used the same pot to make the cheese sauce.) When the butter bubbles, add the flour. Cook, stirring, 1 minute. 3. While whisking, slowly pour in the hot milk a little at a time to keep mixture smooth. Continue cooking, whisking constantly, until the mixture bubbles and becomes thick, 8 to 12 minutes.
  4. Remove the pan from the heat. Stir in salt, nutmeg, black pepper, cayenne pepper, 3 cups cheddar cheese, and 1 1/2 cups Gruyère (or 1 cup Pecorino Romano); set the cheese sauce aside.
  5. Cover a large pot of salted water, and bring to a boil. Cook the macaroni until the outside of pasta is cooked and the inside is underdone, 2 to 3 minutes. Transfer the macaroni to a colander, rinse under cold running water, and drain well. Stir the macaroni into the reserved cheese sauce. 6. Pour the mixture into the prepared dish. Sprinkle the remaining 1 1/2 cups cheddar cheese, 1/2 cup Gruyère (or 1/4 cup Pecorino Romano), and the panko over the top. Bake until golden brown and bubbly, about 30 minutes.
 **If you try to do this with cold cream cheese- I assure you it will not work. You'll get lumps and you lose the volume- the frosting won't be fluffy and spreadable like it should be. I was having some friends into town and frankly- didn't have room in the fridge to store a tiered, iced layer cake. So I decided to bake the cake in a 10- inch springform pan. Instead of icing the cake in advance, I served the cake in slices with a large dollop of the frosting on top. I think it made for a more rustic presentation while allowing everyone to dictate his or her very own cake-frosting ratio which was ideal. (Bonus: I stored the cake covered with foil at room temperature, keeping only the frosting in the fridge.)


