Thursday, July 29, 2010

Chocolate Cream Mini Pies

Yep that's right! Its a cupcake size version of one of my favorite pies. The recipe is very similar to my recent Coconut Cream Pie recipe however this time I made a miniature version of a pie shell filled with homemade chocolate custard and heaping with freshly whipped cream. I started with one refrigerated Pillsbury Pie Crust. I rolled it gently with a rolling pin into a round about 1/3 larger than its original size. I then used a pairing knife to cut circles of dough approx 5 inches in diameter. (They don't have to be perfect.) I was able to get 7 or 8 circles total, re-rolling scraps of dough twice. (The fewer times you reroll, the flakier your crust will be so try to maximize your cuts each time.) I then pressed the pastry dough rounds into a muffin tin and pricked them gently with a fork a few times each. The shells baked at 400 degrees for 8-9 minutes. (You are looking for lightly golden brown.) Some pie weights would really help them keep a more uniform shape but I don't have any yet...they are on my wish list yet I keep forgetting about them. I let them cool in the pan. Note: they would easily keep a day or two in an airtight container. I would wait and fill them with the custard the day of or even just before serving to avoid soggy crust.

Chocolate Custard: •2/3 cup sugar •1/4 cup cornstarch •1/2 teaspoon salt •3 large egg yolks •2 cups milk (all I had on hand was skim and it was still delicious, whole milk would be richer) •1/2 cup good quality bittersweet chocolate, melted •1 tablespoon unsalted butter •1 teaspoon vanilla

I whisked the first four ingredients together in a sauce pan and then slowly poured in the milk, whisking well to get rid of any lumps of flour. I then turned the heat to medium and cooked everything together, stirring constantly until it came to a gentle boil. I let it cook about two minutes more until thickened to a pudding-like state and then removed the pan from the heat. I let the custard mixture cool for a second while I put 1/2 cup good quality chocolate into a small glass bowl and microwaved it heat for one minute until it was barely starting to melt. I gave it a quick mix together and then transferred the chocolate into the custard pan along with the butter and vanilla. The heat of the pudding mixture melts everything together into a smooth and creamy custard.

I transferred it to a glass bowl (sneaking a few spoonfuls for myself to be sure it was delicious) and covered with it plastic wrap so that it was laying directly on top of the custard to prevent a "skin" from forming over the top as it cooled. I kept it in the fridge until ready to serve. (You'll want to give it at least 2 hours to cool completely and set up properly.)

I scooped approximately one half cup of custard into each pie shell and then topped with freshly whipped, slightly sweetened cream - grating some of the chocolate over the top as a garnish.

Like a little cup of heaven I tell you.... I really like the mini pie idea.. For those of you that have made cream pies, you know that you risk the filling oozing out all over the plate or the pie dish if the filling is not PERFECTLY set. This avenue is definitely a little bit more forgiving and the presentation is fun and different. Will definitely be experimenting with more mini pies again soon!

Saturday, July 24, 2010

Stuffed Zucchini

It seems everywhere you go in Lexington this time of year, friends and neighbors are eager to share fresh summer vegetables with you. Unfortunately, my garden hasn't produced much of anything yet because I got such a late start- so I've been grateful to enjoy the surplus of others. My mom gave me a beautiful zucchini the other day- it must have been 10 or 11 inches long- absolutely perfect for this recipe. I sliced the zucchini length wise and gently carved out the seeds with a spoon, leaving a shell barely one half inch thick. I then pricked the flesh all over with a fork to help it cook all the way through while baking. You also use two or three smaller zucchini if you like- the grocery store rarely carries the giant variety. I preheat the oven to 375 degrees... The secret to the sauce is fresh local summer tomatoes. You could use any kind you like- grape, cherry, red, yellow, Roma, etc. I find that the large tomatoes such as Better Boys have tougher skins that should really be removed. Simple Summer Tomato Sauce: 2 tablespoons of olive oil 1/2 of a sweet onion, diced (you'll use the other half in the filling so you can dice the whole onion) 2 cloves of garlic, minced (you'll use two more in the filling so go ahead and mince 4) 1/2 teaspoon dried thyme 1 teaspoon tomato paste 1 cup of grape tomatoes, halved 1 large tomato, peeled and crushed by hand 1/4 cup water 1 teaspoon of sugar salt and pepper to taste 5 or 6 fresh basil leaves, sliced thinly I started the olive oil and onion in a saucepan over medium heat, sauteed for 3-4 minutes until the onions were translucent, and then I added the garlic, thyme and tomato paste. I cooked the mixture for one minute, stirring well, before adding the tomatoes, sugar and water. Lastly I seasoned the sauce with salt and pepper and let it simmer over medium-low heat for 10-12 minutes, stirring occasionally. (I actually didn't add the basil until just before serving to maximize the flavor.) While the sauce was simmering away, I made the filling which consisted of the following: 1/2 pound sweet Italian sausage (casings removed if using links) 1/2 of a small sweet onion, diced (approx 1/2 cup) 1/2 of a bell pepper, diced 1/2 cup Cremini (baby portabella) Mushrooms, roughly chopped 2 cloves of garlic, minced 1/2 teaspoon of dried thyme 1/2 teaspoon crushed red pepper flakes 2 cloves of garlic, minced salt and pepper to taste I started with a generous drizzle of olive oil in a skillet over medium heat and then added the onions. I sauteed the onions for two minutes before adding the bell pepper, and a minute or two later the sausage. I cooked it all together for 7 or 8 minutes, breaking the sausage up with a spoon as it browned. As soon as the sausage was approaching cooked through, I added the remaining ingredients and cooked for two more minutes.
I spooned the filling into the zucchini, packing it in to fit as much as possible. I then spooned some of the sauce over the top (maybe one third of it) and sprinkled over a mixture of grated Italian cheeses. (Next time I would actually mix 1/3 of the sauce into the filling before stuffing the zucchini versus spooning it over the top. I think it would have helped to bind it all together a bit better.)
I then poured 2/3 cup white wine into the dish, covered the dish with tin foil and put it into the oven for 30 minutes. After 30 minutes, I removed the foil, spooned some of the wine and juices from the dish over the top of the zucchini and cooked 10 minutes longer, letting the cheese get nice and toasty brown.
I served the zucchini over a bed of the sauce with a green salad on the side. It would also be good with a side of pasta. You could double the sauce recipe in that case. It really was tasty- (though missing a big crusty piece of garlic toast). The zucchini was perfectly tender and the filling was hearty and flavorful. The extra sauce on the plate added a big punch of freshness without making it soggy (a danger if the sauce is served over the top.)
You could also use the same preparation (filling and sauce) for stuffed baby eggplant or stuffed bell peppers. Its hard to go wrong with this combination... yum.

Thursday, July 22, 2010

Carrot and Turnip Slaw with Dill

So as I've probably shared, I've recently set up shop in a home office here in Lexington, KY. While I love the flexibility and the fact that I can get up, put my hair in a pony tail and head into my office in jeans and a tshirt, it also presents a few challenges.
One big one is my kitchen. You underestimate the frequency at which you would visit your fridge/pantry if it was only a few feet away. Not only do I religiously eat a full breakfast and lunch now, I've also gotten into snacking which is dangerous. I definitely didn't have such compulsions when I was in the office every day (though I was subject to the temptation of donuts birthday cakes, and candy jars that generous colleagues brought in to share.)
Recently I determined the upside is that I can have healthy and inexpensive meals and snacks more readily available at home. (no vending machine, no expensive lunches out with friends -though I do miss those dearly- no potato chips/french fries teasing me in the cafeteria each day...)
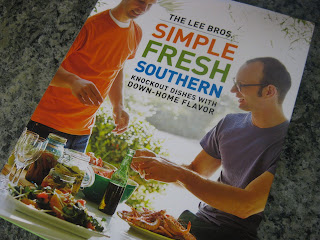
I recently made this delicious carrot and turnip slaw from a new cookbook that a friend gave me called Simple, Fresh, Southern by Matt and Ted Lee of South Carolina. (The encore to James Beard Award Winning 'The Lee Brothers Southern Cookbook'.) It it F.A.N.T.A.S.T.I.C. I tell you. The recipes are unique and original spins on classic Southern flavors, ingredients and preparations. Some examples include Pimento-Cheese Potato Gratin, Devilled Egg Shrimp Salad Sandwiches, Collard Greens with Poblano Chiles and Chorizo, Mint Julep Panna Cotta, etc. I want to try everything so you'll surely see lots of posts coming soon.
My mom brought me some fresh turnips from the farmer's market (they've been a favorite snack since I was in elementary school believe it or not) so when I found this recipe, it sounded like a perfect, light and fresh summer snack. (The goal was to distract me from the Oreo's in the freezer and it worked! kinda...)
If you're not familiar with turnips, you probably think you're not a fan- but I urge you to give them a fair shake. They have a texture similar to a carrot or radish and a sweet yet spicy flavor much like a cabbage. They are delicious roasted in the oven alongside carrots, parsnips and potatoes and I've also had them mashed- similar to rutabaga. (They will look much cleaner, almost entirely white with some purple at the ends in the grocery store.)
I scrubbed two medium and three small turnips and then peeled them with a pairing knife. (I'll admit that I ate one of the small ones at this point- delicious with some kosher salt sprinkled on top- so using three medium turnips would work just fine.) I also peeled five small/medium fresh organic carrots. NOTE: the recipe calls for 1 lb medium carrots and 8 oz white turnips. You could also use all carrots if you insist. I then used my food processor (the grater blade specifically) to grate them all together into a slaw.

I made a simple dressing for the slaw that was shockingly loud in flavor. My only complaint was that there wasn't enough of it. For this volume of veg, I'd recommend 1.5 times the following recipe:

2 Tablespoons finely chopped fresh dill

1/4 cup red or white wine vinegar

2 tablespoons extra-virgin olive oil

1/4 teaspoon ground cumin (I'd go a tad heavier next time)

2 small cloves garlic, finely grated (I recommend using a rasp and using 1 sm/med clove)

1/2 teaspoon crushed dried red chile flakes

1 teaspoon kosher salt (more to taste)

1/2 teaspoon freshly ground black pepper (more to taste)

Now that I re-read the recipe, the Lee Bros suggest you toss the dill in with the grated veggies first versus adding it directly to the dressing. This is a great idea - I actually had a hard time getting the dill evenly distributed in the slaw after dressing it. I think it would toss it better before any liquid is added.

You gently fold it all together and voila! The zest of the garlic, warmth of the cumin and kick from the chile flakes really makes this more exciting than your average coleslaw. I would eat a bowl of it for lunch with some cheese and crackers on the side. It would also be great for any summer bbq or picnic.

Side Note: Another one of the great yet also challenging apsects of working from home is my new little desk buddy, aka Cleo. I'm either ducking from side to side to see the computer monitor around her fuzzy white head (she likes to chase the mouse around the screen) or I'm forced to type everything one-handed as she has one of my arms pinned to the desk as her pillow. Exhibit A:

Wednesday, July 14, 2010

Honey Vanilla Pound Cake with Raspberries

Another winner from Ina Garten's Back to Basics cookbook. Decadent and delicious, its the perfect compliment to fresh summer berries or sliced peaches with some whipped cream. Ingredients: 2 sticks unsalted butter, melted and cooled 1 1/4 cup sugar 4 extra large eggs at room temp (I used 4 large eggs and it came out just fine, 5 might be better)2 tablespoons of honey 1 teaspoon of lemon zest (I used orange) 2 cups of sifted cake flour (all purpose will do) 1 teaspoon kosher salt 1/2 teaspoon baking powder Preheat oven to 350 degrees, racks in the middle of oven. I sprayed two medium sized loaf pans with Pam and then cut a piece of parchment to line the bottom of each. I gave it another quick spray of Pam and then dusted the pans with flour, tapping to remove any excess.

Next I creamed the melted butter and sugar together in the standing mixer (paddle attachment, medium speed) for 3-4 minutes until it was lighter yellow in color. In a separate bowl, I combined the eggs, honey, vanilla, and zest- do not mix.

After scraping down the sides of the mixer bowl with a spatula, I turned it to low speed and poured one egg at a time from the bowl. Per Ina's instruction, I let each egg mix in slowly, then I stopped the mixer and scraped down the sides of the bowl after each addition.

Lastly I combined the dry ingredients in a separate bowl and gave them thorough stir together with a whisk. (This is my method for "sifting" ingredients together.) With the mixer on low speed, I gently poured in the dry mixture and blended until just barely combined. At this point I gently folded in about 3/4 of a cup of frozen raspberries. You could change it up by adding blueberries, chocolate chips or go for enjoy the simple vanilla variety which I will definitely try next time.

I divided the batter between the two loaf pans and baked at 350 degrees for approx 45 minutes or until a toothpick inserted in the center came out clean. I actually let mine go a few minutes too long I think- the edges were a little dark. You could make one large pound cake as Ina does (bake time is 55-60 mins) but I like to make two smaller so that I can freeze one for a quick dessert later or share one with a neighbor. (Besides, having a WHOLE pound cake sitting around for just John and I to snack on is dangerous!)

The pound cake was wonderfully moist and delicious all by itself but for dessert that evening I served it with vanilla ice cream and a fantastic quick raspberry sauce. (Also a recipe borrowed from Ina). Raspberry Sauce: 1 generous cup of raspberries (if frozen, thaw in microwave) 3 tablespoons of raspberry jam- I used a seedless black raspberry jam from Smuckers 'Simply Fruit' A small squeeze of lemon juice (maybe a quarter of lemon) 1 teaspoon sugar Blend it all together in the food processor until smooth and refrigerate until ready to serve. Keeps several days in the fridge- I like to keep old jam jars around for such occasions.

Texas Strip Steak with Cilantro- Parsley Sauce and Crushed Potatoes

I was fortunate to spend last weekend visiting some of my best college friends in Fort Worth, Texas. Though I could very easily have eaten Tex-Mex three meals a day and enjoyed every last bite of it, we opted to cook dinner in Saturday night. We were feeling spent after a decadent brunch at Tillman's Roadhouse followed by an afternoon sipping frozen lemonade with vodka by the pool. Before I get to the menu, I have to tell you about three AMAZING Fort Worth destinations that I would demand you visit if you're ever in the area. 1. La Familia Tex Mex. I hadn't been on Texas soil an hour before I was greeted warmly by an unbelievably delicious and ENORMOUS margarita, a cup of queso and a huge basket of fresh tortilla chips at La Familia. Let's just say my hostess knows me very well... They bring you a little cup of delicious soup before your meal. For dinner we opted for Tacos al Carbon- one chicken, one steak- loaded with grilled onions inside of freshly made tortillas and accompanied by fresh guac, pico, cheese, etc. HEAVENLY I tell you... Oh, did I say margarita?? I meant to tell you that it HAD A BEER STICKING OUT OF THE TOP and flaming sugar cubes on the sides as they brought it to the table... As you drink the margarita (you'll need a straw for this one) the beer slowly empties into the glass. Absolutely amazing!

2. I mentioned Tillman's Roadhouse brunch earlier... this place was absolutely unlike anything I've ever seen before. It is rustic roadhouse meats metropolitan chic. Its a log-cabin feel with longhorns on the wall and huge crystal chandeliers hanging from the ceiling. You'd really have to see it to understand but the food was equally as clever and unique. They bring you fresh fried kettle chips at the table when you sit down and the menu incredible. We'd already been warned about dessert so unfortunately we decided to pass on the house made monkey bread that I happened to see at a nearby table. It was a HEAP of gooey doughy cinnamon deliciousness.

For my entree I enjoyed the "Bennie and the Jets" dish of two blue corn cakes topped with pulled pork bbq, poached eggs and green chile "bacon-daise." Lets just say its a benedict like you've never experienced before. Incredible. 'Nuff said.

Lastly... we ordered the Smores for dessert... The brought us three different kinds of HOMEMADE marshmallows (espresso, maple and orange flavors), rich dark chocolate squares and house made graham crackers on a huge platter. Then they bring out mini bonfires (in little clay pots) and skewers for you to toast your marshmallows table side! I'm telling you, if you're ever in the area, you can't miss it.

3. Central Market. If you've been to Austin or DFW you've probably heard of Central Market but this was my first experience. It is any food lovers HEAVEN ON EARTH. It is an enormous market that I would equate to Whole Foods on super steroids. It is a giant warehouse containing the most impressive array of fresh produce, meets, seafood, wine and grocery items. This is where we did our shopping for dinner Saturday night and I literally could have spent days there. When it was time to plan a menu for dinner, I had no hope of topping brunch but seeing as we were in cattle country I picked out three TEXAS-sized strip steaks which was more than enough for the six of us. I seasoned them simply with a steak rub and let sit out at room temperature while I prepped a quick and simple Parsley-Cilantro dipping sauce and Michael Chiarello's Potatoes da Delphina.

I'll refer you to Michael's recipe for more details about the potatoes but its a fun alternative to baked or your standard roasted potatoes. I subbed in parmesan cheese for the lemon zest this time.

For the Cilantro-Parsley Sauce, I combined the following ingredients in the food processor:

1/2 bunch parsley, stems removed 1/2 bunch cilantro, stems removed 1 jalapeno, seeds removed, roughly chopped 2 large cloves of garlic 1/4 cup red wine vinegar 1 teaspoon salt 1/2 teaspoon pepper I whirred everything together in the food processor and then while it was running I slowly poured about 1/3 cup of olive oil down the spout. I grilled the steaks for approx 4 minutes per side for medium rare. Liz had sliced a large vidalia onion into thick slices and then wrapped them up in tin foil with some butter, Worcestershire sauce, salt and pepper. (I think..) I set the foil packets on the grill at the same time as the steaks. I then threw on some asparagus (with just olive oil, salt and pepper) for the last 4 minutes of the grill time. I let the steaks rest 10 minutes and then sliced them on a large wooden cutting board and let everyone serve themselves. (I was keeping the potatoes warm in the oven until ready to serve.) I transferred the Cilantro-Parsley sauce to a small pitcher to drizzle over top the steak. It adds a huge punch of flavor. You'll end up dunking just about everything on your plate into it. Can't wait to get back some day soon.. where everything is bigger, and as far as eating and drinking goes, maybe a little better... in Texas!!

Picnic Perfect Black Bean and Corn Salad

John and I were invited to a 4th of July picnic with some new friends in Lexington and each guest was to bring a side dish. This pot-luck-ish scenario always throws me for a loop because I'm constantly worried about making something too generic -others might bring the same- or too far out there -might not accommodate every one's taste. (Nobody wants to claim the dish at the end of the night that has hardly been touched...) After much debate I settled on a Black Bean and Corn Salad. My Mom makes a dip or salsa that is very similar so I fused her recipe (a fusion of two other recipes) with a Grilled Corn, Jicama and Black Bean Salad recipe that I found on Epicurious.com. I loved the idea of grilling the corn for more flavor and adding jicama for crunch- however based on a review of the recipe on Epicurious, I decided to roast the corn in the oven. I cut the corn kernels off of the cob *click here for instruction and placed them in a pile in the center of a large baking sheet sprayed lightly with Pam. I then drizzled the pile with a bit of olive oil, sprinkled with a small pinch of salt and pepper and then tossed to coat before spreading it evenly over the pan. I roasted the corn for 8-10 minutes at 425 degrees until just golden brown. If you're not familiar with jicama, it is a root vegetable described by wikapedia as a "Mexican turnip." It is very crisp and light with a very mild flavor and a texture similar to a raw apple. Frankly, it takes on the flavor of whatever the preparation but adds great crunch to a salad or slaw such as this one.

Ingredients: 3 large ears of corn, roasted per above 2- 15 oz cans of Black Beans (drained and rinsed well) 1- red or orange bell pepper- cut to a small dice (similar to the size of a bean or corn kernel) 1 jalapeno pepper- seeds removed and diced VERY finely 1 cup jicama- peeled and diced 4 or 5 green onions- white and green parts, thinly sliced 1/3 cup cilantro- chopped

I combined all of the veggies in a large bowl and then mixed up the dressing on the side: 2 tablespoons fresh lime juice 2 tablespoons fresh orange juice 2 tablespoons balsamic vinegar 3 tablespoons olive oil 1/2 teaspoon cumin 1 teaspoon kosher salt 1/4 teaspoon cayenne pepper

I mixed the dressing thoroughly with a fork, poured over the salad mixture, and gently folded everything together. The salad actually gets better as it sits in the fridge- I recommend at least 2 hrs- and it keeps for up to 3 or 4 days in the fridge.

It was the perfect cool crunchy compliment to fried chicken on a hot July 4th day. It would be great with a tex-mex menu or you could serve it for lunch with the addition of some grilled chicken or shrimp.

We enjoyed left overs the following day alongside some fantastic burgers. (Extending our 4th celebration to the 5th.) We used 2/3lb lean ground beef and 1/3lb ground sirloin (makes four hefty burgers), seasoned simply with a Napa Style Steak/Burger spice rub. John grilled the burgers, grilled some asparagus and lightly toasted fresh rolls from our grocer's bakery while I caramelized some vidalia onions and sliced some Gruyere cheese for toppings. Happy Birthday America...

Friday, July 2, 2010

Oven Roasted Halibut with Carrots and Beets

Halibut is one of my very favorite fishes. I've been working to find the very best cooking preparation. I would venture to say its not quite as forgiving as something like Salmon. If you over cook it or cook it unevenly the texture changes dramatically to tough and almost fibrous. Fortunately, this last dish came out very very well. (If I do say so myself...) I found beautiful Halibut fillets (1 and 1/2 inches thick) at Whole Foods- I purchased approx 1/2 or 2/3 of a pound for the two of us. Seeing as I was spending $17/lb on the fish for a weeknight dinner, I made a simply medley of roasted root vegetables on the side. It is very inexpensive but still delicious. I chose baby carrots, red beets and vidalia onion. I LOVE beets and red ones give the roasted vegetables a beautiful ruby red color. Preheat oven to 425 degrees. Roasted Carrots and Beets: 1 generous cup of carrots (if baby carrots, cut in half- if larger, cut into 1/2 inch pieces) 3 medium/large red beets (peeled and diced into 1/2 inch pieces) 1 small vidalia onion (diced into 1/2 inch pieces) While its a little putsy to cut the veggies into smaller pieces, you make up the time while cooking. Cutting them roughly the same size also ensures everything cooks evenly which is important. I would also recommend wearing plastic gloves to peel and dice the beets as the red does stain your hands a bit. If you don't have them, I sometimes use a paper towel to hold the beets. I actually set the beets aside in a separate bowl from the carrots and onions to avoid everything turning immediately red. I made a quick dressing for the veggies: 1/4 cup olive oil 2 tablespoons of balsamic vinegar the juice of half an orange 1 tablespoon of honey 1/2 teaspoon of dried thyme 1 teaspoon kosher salt 1/2 teaspoon pepper I mixed it together in a liquid measuring cup and then poured 2/3 of the mixture over the carrots and onions in one bowl, tossing everything to coat with the dressing. I then tossed the beets with most of the remaining dressing (save just a tiny bit) before transferring everything to a large baking sheet sprayed lightly with Pam. Into the oven they go for 20 minutes. In the meantime I rubbed the halibut fillets with the last drops of the dressing and seasoned with kosher salt and pepper. I set them out at room temperature while the vegetables were roasting so that they would cook evenly through. At the 20 minute mark, I first shuffled the vegetables about the baking sheet with a spatula and then pushed them toward the sides to make a small space in the middle of the pan for the halibut. I placed the filets on the baking sheet (you get a nice sizzle seeing as the pan is already hot from the oven) and roasted everything together for another 10-12 minutes until the fish was perfectly tender. The fish should be barely firm to the touch and will flake easily when pierced with a fork. You can test a corner to be sure its just right. Yummm..... The dish was surprisingly light yet roasting the vegetables lends a heartiness to the meal.
I actually forgot to serve it with dinner but I enjoyed the left over roasted vegetables for lunch the following day with crumbled goat cheese over the top. Its an absolutely fantastic combo.

Ribeye with Spicy Hoisin Glaze and Sesame Cucumber Salad

Now that I'm living the heart of American farm land, I'm trying to broaden my meat horizons a bit. In Charleston, we had enough fresh fish and shellfish to keep a the health-conscious home cook occupied in the kitchen for years however I've decided to branch out. Its only appropriate seeing as my parents raise beef cattle about 40 miles from here- therefore I'm eager to learn more about the local industry. I have a Whole Foods and Fresh Market handy which I love because on the whole I trust their meat sources however I've also discovered that my Kroger carries Laura's Lean Beef, an all natural cattle producer right here in Lexington, KY. I found the Bon Appetite recipe for Grass Fed Strip Steak with Spicy Hoisin Sauce and Cucumber Relish on Epicurious.com. Though featuring red meat, I thought the menu sounded particularly light and refreshing. I decided to sub in a Ribeye based on the fact it looked better at the store. The ticket here is that one steak generously feed two people. Slicing it thinly before serving really helps fill up your plate with less food. (If I'd put half of a whole steak on the plate, John would have raised an eyebrow for sure.) I first generously seasoned the steak with kosher salt and black pepper, letting it sit out, covered in foil, to come to room temperature. This helps it cook evenly. Next I peeled and sliced 3/4 of an English cucumber into quarter-inch, half slices and tossed it with a simple dressing of: - Scant 1/4 cup rice vinegar - 1.5 teaspoon of grated fresh ginger (I actually by the little jar of of it and keep it in the fridge) - 1 teaspoon of lightly toasted sesame seeds - pinch of sugar and salt I let this set up in the fridge for 20-30 minutes in the fridge to let the cucumbers soak up the flavors. You definitely want to serve this nice and cold. Thirdly, I prepared the Spicy Hoisin Glaze (I took a few short cuts here while cutting the recipe by half)... •1 teaspoon olive oil •1 medium shallots, thinly sliced •1 garlic cloves, minced •1 teaspoon finely grated peeled fresh ginger •1/4 teaspoon dried crushed red pepper •1/4 cup low-salt chicken broth •scant 1/4 cup hoisin sauce (you can find it in the Asian section of most groceries) •2 teaspoons light soy sauce •1 tablespoons honey

(The recipe also called for Cilantro which I did not have but it would have been a fantastic addition.) Per the recipe: Heat oil in medium saucepan over medium heat. Add shallots and next 3 ingredients; sauté 5 minutes. Add broth, hoisin, and soy sauce; boil until slightly thickened, about 5 minutes. Stir in honey.

I removed the glaze from the heat and then prepared a cast iron skillet for "grilling" the steak. I love a steak on the grill but if you love your steak medium rare (or if you're having a lazy day and don't feel like getting the grill ready) I swear by this method. I find I'm consistently able to avoid over cooking. I heat some vegetable oil (just a drizzle and not olive oil because the smoke point isn't as high enough) over medium-high/high heat until rippling. I then sear the steak for two-three minutes per side. That's.it. I let it rest under tented-foil for 10 minutes before serving. Note: it continues to cook some as it sits.

While the steak was resting, I sliced one medium vidalia onion into half inch slices. I threw it into the cast iron skillet and sauteed in the left over oil and steak renderings over medium heat until tender and golden brown. (A bit decadent I know but its the only splurge in the menu.) I added a little squeeze of honey and one teaspoon of rice vinegar to de-glaze the little bits of goodness and to help facilitate caramelization. Lastly I sliced the steak thinly into "his and hers" portions onto two plates, spooned some of the Hoisin Glaze over top and then served a generous spoonful of the cucumber salad and sauteed onions alongside. The cool, crispy cucumbers cut through the heat and the richness of the steak and onions just perfectly. The glaze was the perfect sweet, spicy, savory combination. It would be great over grilled chicken or pork tenderloin as well. The dish was incredibly satisfying despite the fact we were in essence splitting a steak and omitting starch. It will definitely be going into the summer rotation this year. His... Hers...